Imagine the silence in a room before chaos erupts. One moment, people are chatting; the next, someone collapses. In that split second, hesitation kills. This is why traditional lecture-based CPR training often fails when real emergencies strike. Learners know the steps but freeze under pressure. The solution? A scenario-based CPR and AED skills lab. This approach transforms passive learners into confident responders by simulating the stress, noise, and urgency of real cardiac arrest events.
Designing such a lab isn't just about buying manikins. It requires careful planning of physical space, psychological safety, and progressive complexity. If you are building or upgrading a training facility, this guide will walk you through the essential components of a high-impact emergency response simulation center.
The Core Philosophy: From Knowledge to Muscle Memory
Most standard courses teach Cardiopulmonary Resuscitation as a checklist: check for breathing, call for help, start compressions. While accurate, this method lacks context. In a skills lab, the goal shifts from memorization to automaticity. You want the learner’s hands to move before their brain fully processes the situation.
This relies on the concept of deliberate practice. Instead of repeating perfect compressions ten times in a row, students face interruptions. Maybe the victim vomits. Maybe a bystander tries to intervene. Maybe the Automated External Defibrillator (AED) battery is low. These variables force the brain to adapt, creating stronger neural pathways than rote repetition ever could.
Research in medical education shows that scenario-based learning improves retention rates by up to 75% compared to didactic instruction. By embedding knowledge within action, you ensure that when a real crisis hits, the response is instinctive rather than intellectual.
Physical Layout: Creating Realistic Environments
Your lab design must mimic real-world settings where cardiac arrests commonly occur. A sterile classroom doesn't prepare anyone for an office chair collapse or a gym floor incident. Divide your space into distinct zones:
- The Office Zone: Tight spaces with desks and chairs. This teaches learners how to position themselves and perform compressions in confined areas. Use realistic props like coffee cups and papers to add visual clutter.
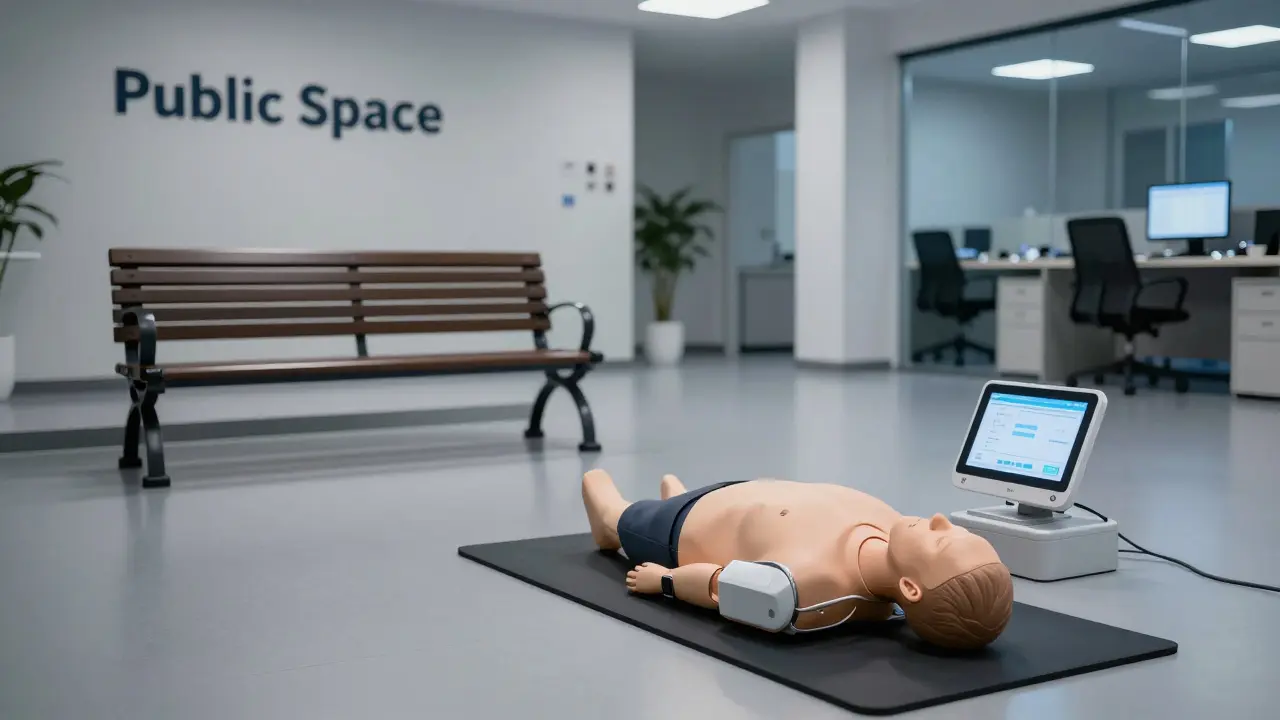
- The Public Space: An open area simulating a park bench or airport terminal. Here, focus on crowd control and directing bystanders. Noise machines can play ambient sounds to test auditory processing.
- The Industrial/Workplace Zone: Hard floors, potential hazards, and heavy machinery visuals. This area emphasizes scene safety-a critical step often overlooked in basic training.
Lighting plays a crucial role. Avoid bright, even lighting. Use dimmer switches to simulate evening emergencies or power outages. Poor visibility forces learners to rely on tactile feedback during chest compressions, a vital skill when adrenaline clouds vision.
Flooring matters too. Rubber mats are standard for comfort, but consider adding hard surfaces in specific zones. Performing CPR on concrete changes the biomechanics of compression depth and rate. Learners need to experience this physical resistance to understand the effort required in real scenarios.
Technology Integration: Smart Manikins and Feedback Loops
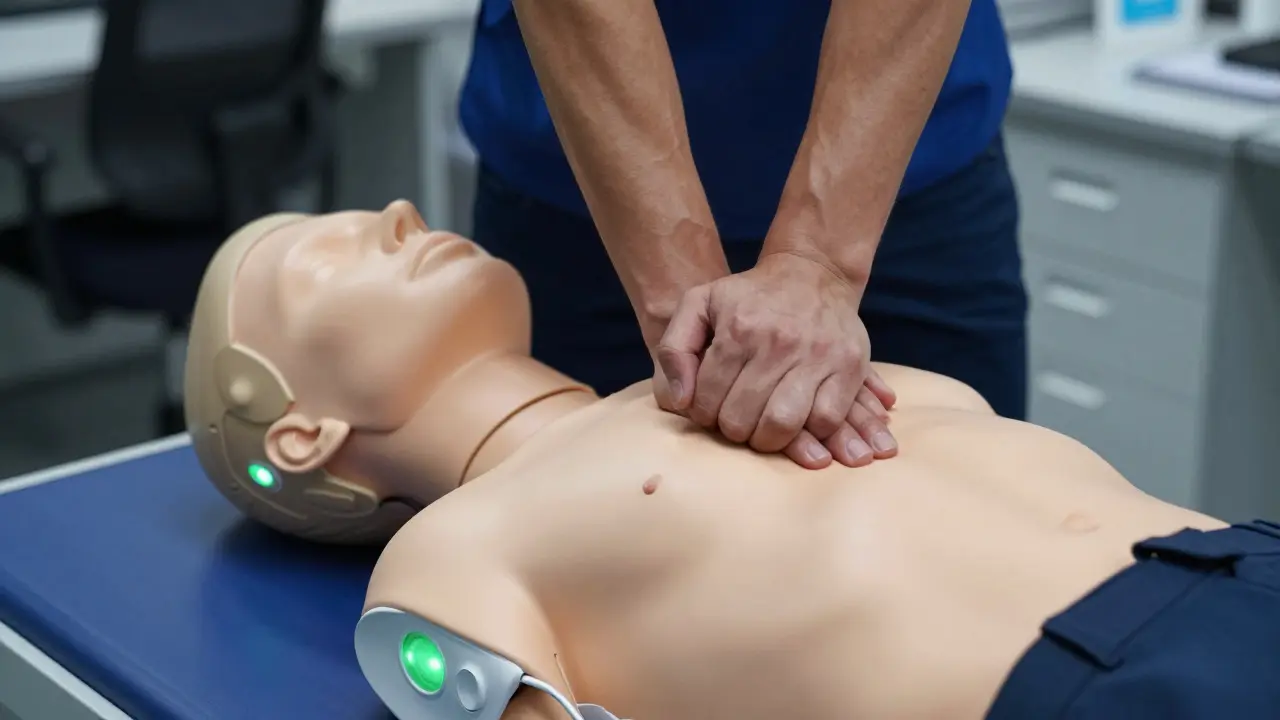
Gone are the days of simple plastic dummies. Modern simulation technology offers real-time biofeedback. Invest in manikins equipped with sensors that measure compression depth, rate, recoil, and hand placement. Devices like the Laerdal ProHeart or SimMan provide immediate data to instructors.
Integrate these devices with a central monitoring station. When a student performs compressions, the instructor sees a live graph on a screen. Red zones indicate insufficient depth; green zones show optimal performance. This visual feedback allows for instant correction without stopping the flow of the scenario.
Don't forget the AED trainers. These units should simulate voice prompts accurately. Some advanced models allow you to customize the script, introducing delays or errors to test troubleshooting skills. For example, have the AED say "Check connections" when the pads are fine, forcing the student to verify electrode adhesion rather than blindly following instructions.
Consider adding video recording capabilities. Post-scenario debriefing is where most learning happens. Watching themselves hesitate or rush helps learners identify blind spots. Ensure privacy protocols are in place, allowing participants to review their own footage without public shaming.
Scenario Design: Progressive Complexity
A good course starts simple and gets harder. Structure your curriculum around three tiers of complexity:
- Tier 1: Controlled Environment. Single rescuer, adult victim, clear airway, immediate AED access. Focus on correct technique and timing.
- Tier 2: Complicating Factors. Two rescuers switching roles, child victim requiring different compression ratios, noisy environment, delayed AED arrival. Introduce communication challenges.
- Tier 3: High-Stress Simulation. Unresponsive victim with agonal breathing, uncooperative bystanders, poor lighting, multiple victims. Test decision-making under extreme pressure.
Each scenario should have a clear objective but unpredictable elements. Use standardized patients-actors trained to portray specific symptoms-to add emotional realism. Seeing a "person" gasping for air triggers a stronger empathetic response than a plastic head.
Incorporate "failure states." Let some scenarios end in death despite best efforts. This teaches resilience and the importance of continuous care until professional help arrives. It also normalizes the outcome, reducing the fear of making mistakes.
The Debriefing Process: Closing the Learning Loop
The scenario itself is only half the lesson. The other half is the debrief. Use the Plus-Delta method: what went well (Plus) and what would you change (Delta). Encourage self-assessment first. Ask, "How do you feel you performed?" before offering your critique.
Focus on behaviors, not personalities. Say, "The compression rate dropped below 100 per minute at the two-minute mark," instead of "You got tired." Provide specific data from the smart manikin to support your points. This removes emotion and keeps the discussion objective.
Create a safe culture. Mistakes are expected and necessary for learning. If learners fear judgment, they will hide errors in future scenarios. Celebrate small wins, like correctly identifying agonal breathing or effectively managing a crowd. Positive reinforcement builds confidence alongside competence.

Compliance and Certification Standards
Ensure your lab meets local regulatory requirements. In the UK, align with guidelines from the Resuscitation Council UK. Their standards dictate minimum compression depths (5-6 cm for adults), rates (100-120 bpm), and recovery between cycles. Your equipment must be calibrated to these metrics.
Maintain detailed logs of all sessions. Track individual progress over time. This data is invaluable for accreditation purposes and for demonstrating the effectiveness of your training program to employers or insurance providers.
Regularly update your scenarios based on new research. Guidelines change every five years. Stay current with the latest evidence-based practices to ensure your lab remains relevant and authoritative.
| Component | Function | Recommended Specification |
|---|---|---|
| Smart Manikins | Provide real-time feedback on compression quality | Sensors for depth, rate, recoil, hand placement |
| AED Trainers | Simulate defibrillation workflows | Customizable voice prompts, shock detection |
| Video Recording | Enable post-scenario analysis | Multiple angles, audio capture, privacy controls |
| Environmental Props | Create realistic contexts | Office furniture, noise generators, dimmable lights |
| Debriefing Software | Facilitate structured feedback | Timeline synchronization with video/audio |
Overcoming Common Challenges
Budget constraints often limit technology purchases. Start small. Use low-cost manikins with manual feedback mechanisms while investing heavily in actor training and scenario design. Human interaction adds more value than expensive hardware alone.
Space limitations are another hurdle. If you lack a dedicated lab, partner with local businesses. Conduct mobile simulations in offices, gyms, and community centers. This brings the training to the environment where it matters most.
Instructor burnout is real. Running intense scenarios is emotionally draining. Rotate staff regularly and provide support resources. Cross-train team members so no single person bears the full load of facilitation and debriefing.
Finally, address participant anxiety. Many people fear hurting the victim. Reassure them that broken ribs are better than a dead heart. Emphasize that doing something is always superior to doing nothing. This mindset shift reduces paralysis by analysis.
Measuring Success: Beyond the Certificate
Traditional exams measure knowledge recall. Your lab should measure behavioral change. Track metrics like time-to-first-compression, consistency of rhythm, and effective communication with bystanders.
Conduct follow-up surveys months after training. Ask if participants felt prepared to act in real-life situations. Look for stories of actual interventions. These qualitative outcomes prove the long-term impact of your program.
Share success stories publicly. Case studies build credibility and attract new clients. Show how your scenario-based approach creates confident, capable responders ready to save lives.
What makes scenario-based training better than traditional CPR classes?
Scenario-based training places learners in realistic, high-stress environments that mimic real emergencies. Unlike traditional classes that focus on memorizing steps, this method builds muscle memory and decision-making skills under pressure. It addresses common barriers like crowd control, equipment failure, and emotional distress, leading to higher retention and confidence.
Do I need expensive smart manikins for a skills lab?
While smart manikins offer valuable real-time feedback, they are not strictly necessary to start. You can begin with standard manikins and focus on high-quality scenario design and actor involvement. As your budget grows, invest in technology that provides specific data points like compression depth and rate to enhance precision.
How do I handle participants who freeze during simulations?
Freezing is a natural response to stress. Instructors should pause the scenario gently, reassure the participant, and guide them through the first step. Use the debriefing session to explore why they froze and practice overcoming that hesitation. Gradual exposure to increasing stress levels helps desensitize the fear response over time.
Can I run a CPR skills lab in a small office space?
Yes, you can adapt smaller spaces by focusing on compact scenarios. Use existing furniture to create realistic constraints. Mobile training kits allow you to set up temporary labs in various locations. The key is to prioritize scenario realism and instructor guidance over large-scale infrastructure.
What are the key metrics for evaluating performance in a skills lab?
Key metrics include time-to-first-compression, compression depth (5-6 cm for adults), compression rate (100-120 bpm), full chest recoil, and effective communication with bystanders. Additionally, assess the ability to manage environmental factors and troubleshoot equipment issues like AED pad placement.
